Technical Advice
 Floor Gully Trap Installation Manual
Step 1
Step 2
Step 3
Step 4

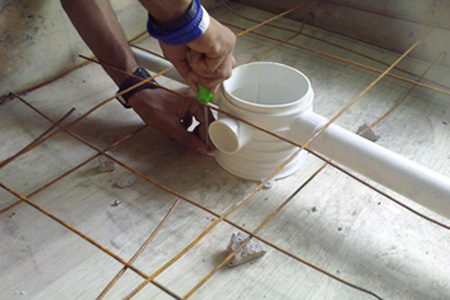
Step 5
Be sure to use good quality PVC solvent cement (PVC glue) to join bottom outlet to the base of the body.

Step 6
Make sure to fully push the bottom outlet into the body under concrete soffit before joining the fitting by others to start piping work.
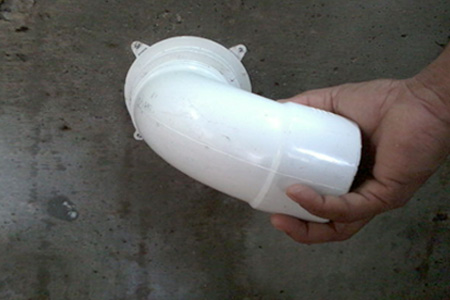
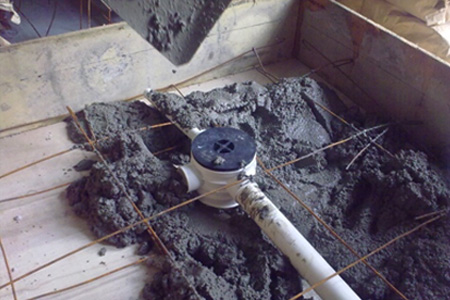
Step 7
After completed install bottom outlet, joining the fitting by other to start piping works.
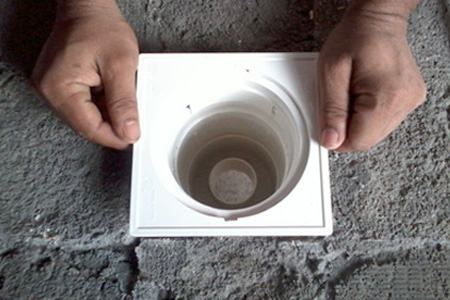
Step 8
After water proofing or ponding test, remove black cap and place collar into position. Ensure it sits perfectly in body trap and during cement screeting to suit collar and tile laying level.
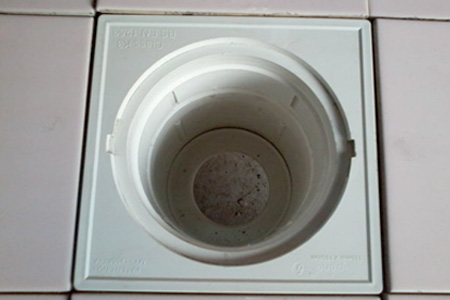
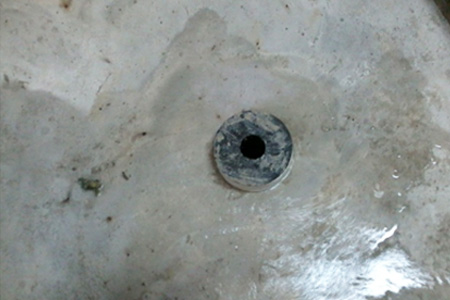
Step 9
Make sure collar is flush with tiling work to ensure smooth flow of water in future.
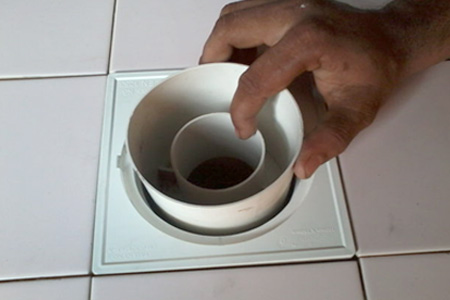
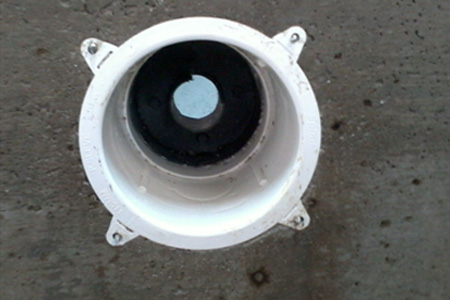
Step 10
Drop in bowl/container into body for water seal and future ease of maintenance.
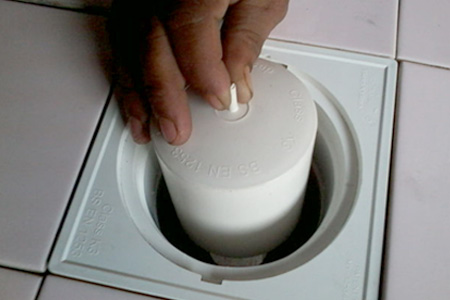
Step 11
Also drop the bell cap into container for completed water seal.
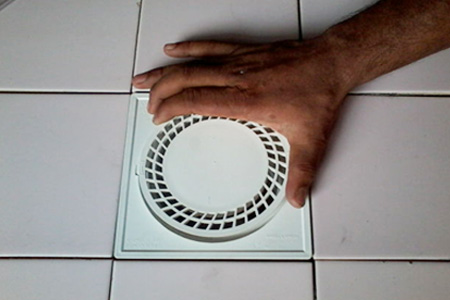
Step 12
Lastly, drop in grating to complete installation of floor trap.
Floor Gully Trap Installation Manual
Step 1
Step 2
Step 3
Step 4
Step 5
Be sure to use good quality PVC solvent cement (PVC glue) to join bottom outlet to the base of the body.
Step 6
Make sure to fully push the bottom outlet into the body under concrete soffit before joining the fitting by others to start piping work.
Step 7
After completed install bottom outlet, joining the fitting by other to start piping works.
Step 8
After water proofing or ponding test, remove black cap and place collar into position. Ensure it sits perfectly in body trap and during cement screeting to suit collar and tile laying level.
Step 9
Make sure collar is flush with tiling work to ensure smooth flow of water in future.
Step 10
Drop in bowl/container into body for water seal and future ease of maintenance.
Step 11
Also drop the bell cap into container for completed water seal.
Step 12
Lastly, drop in grating to complete installation of floor trap.


INFO
SPIND MALAYSIA SDN BHD
38, Jalan Utama 1/2,
Taman Perindustrian Puchong Utama Sekysen 1,
47130 Puchong,
Selangor.
Tel: 603 8060 5500
Fax: 603 8060 5511
Email: info@spind.com.my
Sales Inquiry:
+6012-249 9821 (Mr. Ngai)
+6019-282 0972 (Mr. Cheong)
PRODUCTS & SERVICES
CONTACT US

Copyright © 2021
Top Floor Trap Grating Manufacturer Malaysia, Spind.
All Rights Reserved
PRODUCTS & SERVICES
CONTACT US
Copyright © 2021
Top Floor Trap Manufacturer Malaysia, Spind.
All Rights Reserved